前言
之前上过一个Linux的选修课,了解了Linux系统的一些知识,越用越觉得一些需要命令行的软件用Linux来简直太方便了,这篇文章就介绍以下如何在windows系统上搭建Linux子系统(也就是wsl)(Windows Subsystem for Linux),这样就不用使用VMware来装虚拟机了
windows 10 开启wsl功能
- 按Windows+Q进入搜索功能,也可以右键点击开始,选择里面的搜索功能
- 在Windows 10的搜索框中输入
启用或关闭Windows功能 - 打开后选中
适用于Linux的Windows子系统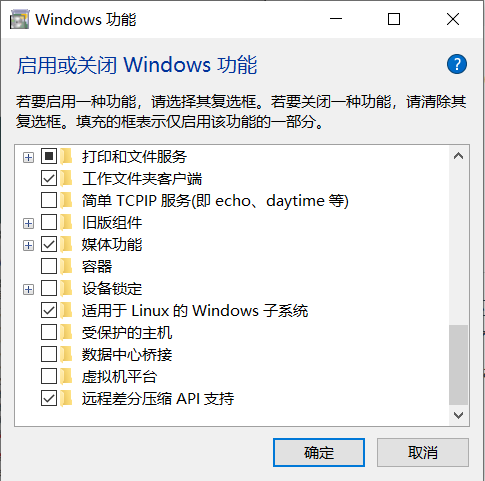
Linux的安装
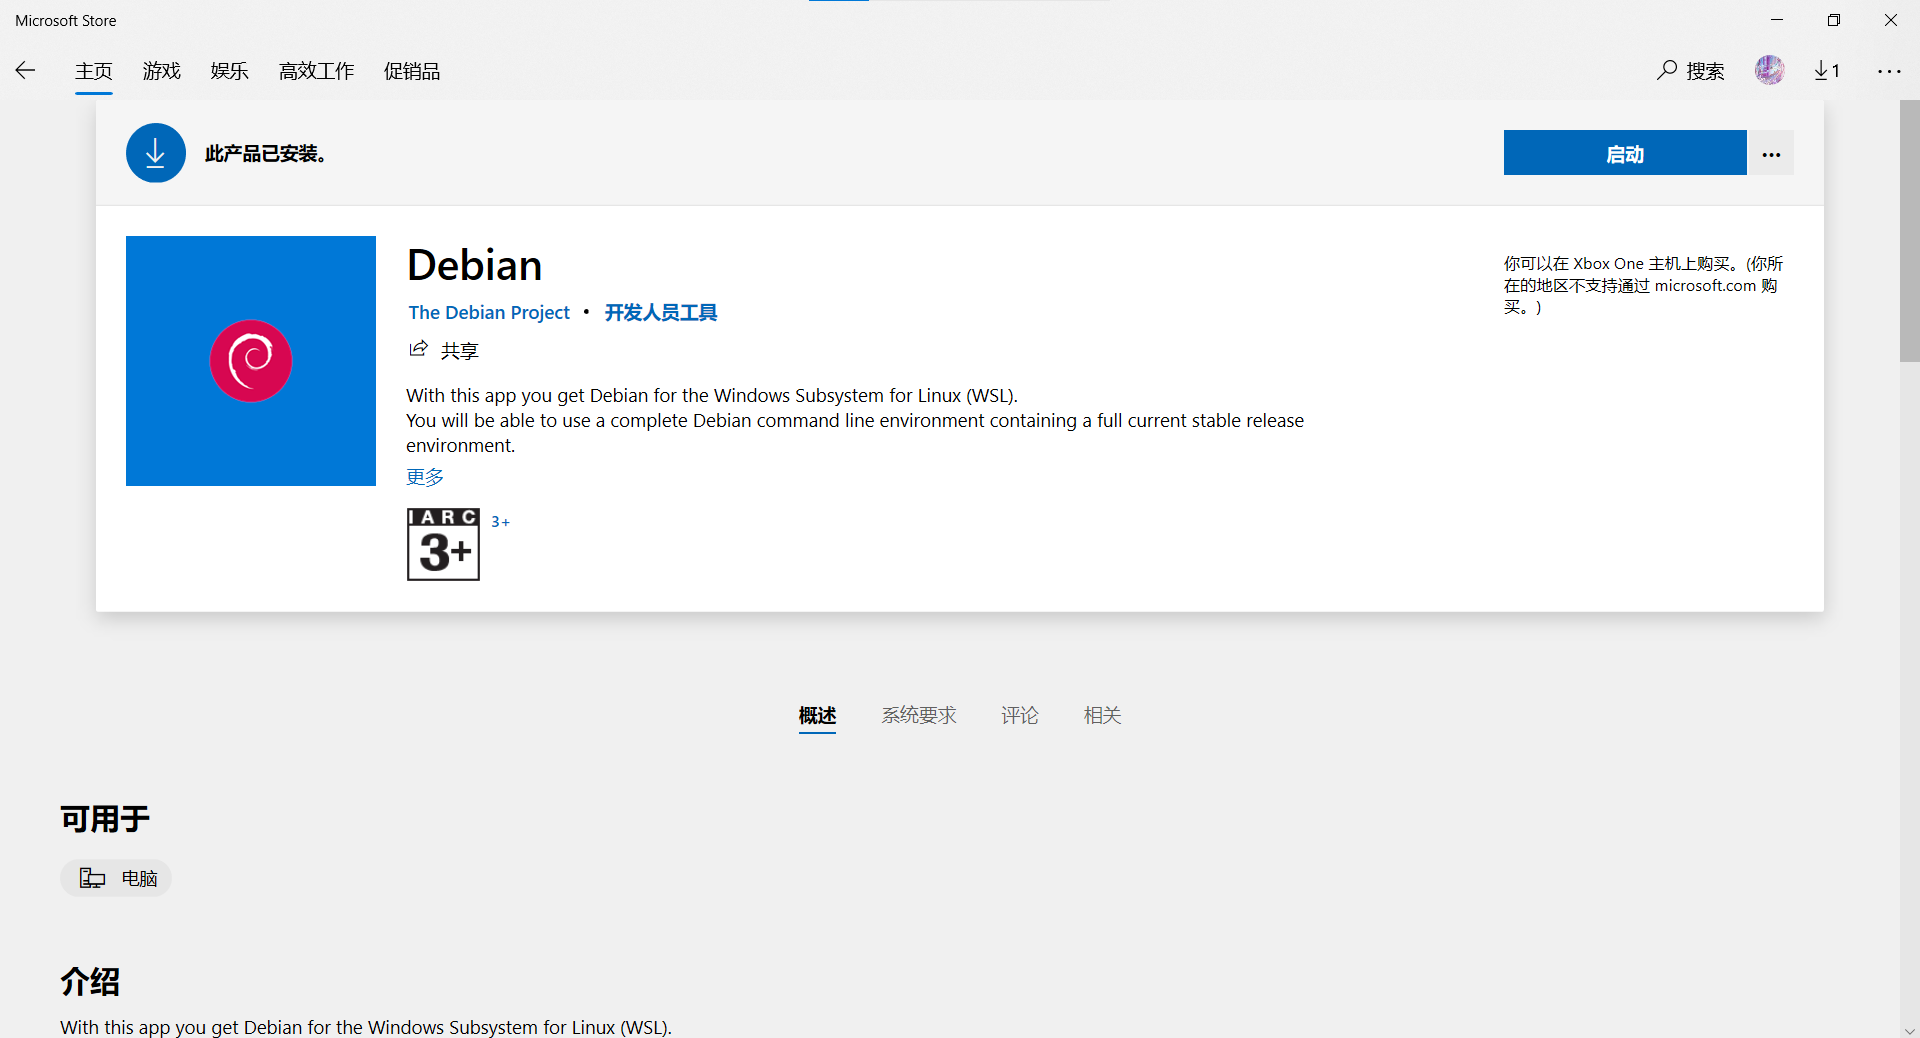
- 打开微软商店(Microsoft Store)
- 搜索Linux
- 选择其中的一个发行版本进行安装,本文以debian为例

Linux初始化
打开刚下好的Linux,等一小会它的安装
输入新创建的用户名
输入该用户的密码,输入两次后就进入了Linux系统,新用户也创建完成
输入
sudo passwd更改root的密码一些知识
输入
su再输入密码进入root模式
输入exit或者按ctrl+d退出root模式
输入sudo 命令可以在普通用户下执行root权限的命令,密码是普通用户的密码
Terminal安装
Terminal是一款高颜值的管理命令行软件,如果你习惯于PowerShell或者cmd的话可以跳过此步骤
- 打开微软商店(MicroSoft Store)
- 搜索Terminal
- 点击安装
Terminal配置
简单配置一下Terminal,让你用起来更舒服,可跳过
- 打开Terminal
- 打开设置
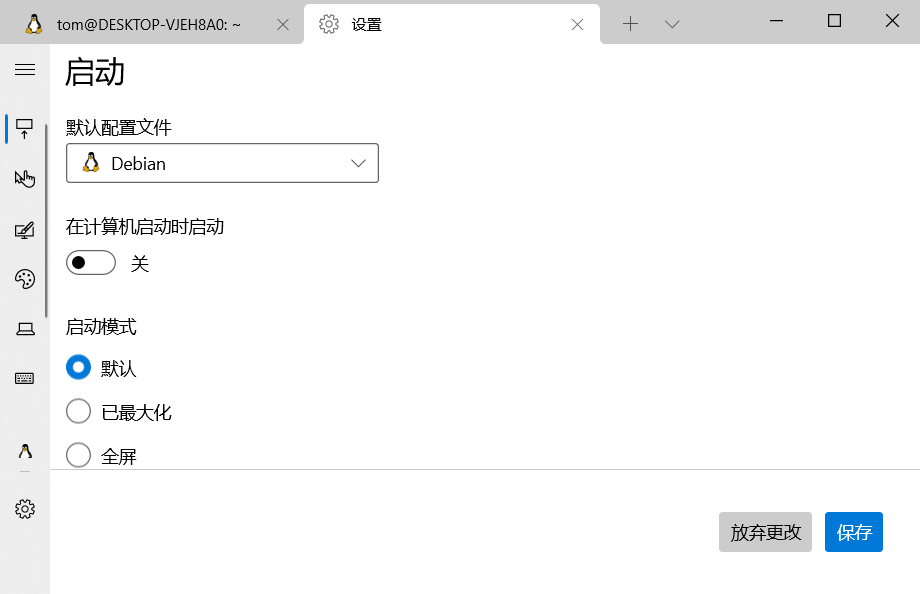
- 点击左下角的设置图标,进入Terminal的配置文件,如下,为了安全起见建议备份一下,不然出问题不好还原
1 | // This file was initially generated by Windows Terminal 1.4.3243.0 |
- 更改配置的几个地方(不要直接复制粘贴,一些值不同)
- 更改
defaultProfile,后面的值就粘贴list里面的几个项的guid,这是默认启动打开哪个命令行,我设置的是Debian的 initialRows和initialCols设置打开后初始宽高profiles中的defaults是全局设置,可以对照更改。list里面就是Terminal管理的几个命令行软件,有刚装的debian,cmd,Powershell等- 我在
list里Debian的设置中加了"startingDirectory":"//wsl$/Debian/home/tom/",这是默认打开Debian后的目录,tom是我的用户名,大家可以改成自己的 schemes中的配置是主题的一些配置,大家可以直接复制粘贴过去添加上actions中是快捷键的配置,大家自行参考
- 更改
恭喜,至此Terminal配置完毕,我用的也是老师给的配置,觉得挺简约还挺好看的,一些其他更花里胡哨的配置请自行网上冲浪
配置wsl
言归正传,接下来我们可以使用terminal打开debian,可以在那个加号后面的向下的小箭头里面选择打开的命令行
换源
因为debian使用apt作为包管理器,而apt的默认服务器在国外,网速很慢,我们可以换到国内的镜像源来
使用
su切换到root权限输入
cd /etc/apt切换到对应目录输入
cp /etc/apt/sources.list /etc/apt/sources.list_backup备份一下源文件,出错的话便于还原输入
nano sources.list利用nano打开sources.list文件如果你会使用其他文本编辑器也是一样的
实在不会用的话也可以用记事本,wsl的根目录在windows的C:\Users\Admin\AppData\Local\Packages\TheDebianProject.DebianGNULinux_76v4gfsz19hv4\LocalState\rootfs下,其中用户名和装的Linux有出入,大家对照自己的就行
用记事本打开并做下面更改,保存即可删除所有内容,将以下内容复制粘贴进去(命令行中复制和粘贴都是右键)
debian源:
1
2
3
4
5
6
7
8
# 中科大源
deb http://mirrors.ustc.edu.cn/debian stable main contrib non-free
deb http://mirrors.ustc.edu.cn/debian stable-updates main contrib non-freeUbuntu源:
1
2
3
4
5
6
7
8
9
10
11
# 阿里源
deb http://mirrors.aliyun.com/ubuntu/ bionic main restricted universe multiverse
deb http://mirrors.aliyun.com/ubuntu/ bionic-security main restricted universe multiverse
deb http://mirrors.aliyun.com/ubuntu/ bionic-updates main restricted universe multiverse
deb http://mirrors.aliyun.com/ubuntu/ bionic-proposed main restricted universe multiverse
deb http://mirrors.aliyun.com/ubuntu/ bionic-backports main restricted universe multiverse
deb-src http://mirrors.aliyun.com/ubuntu/ bionic main restricted universe multiverse
deb-src http://mirrors.aliyun.com/ubuntu/ bionic-security main restricted universe multiverse
deb-src http://mirrors.aliyun.com/ubuntu/ bionic-updates main restricted universe multiverse
deb-src http://mirrors.aliyun.com/ubuntu/ bionic-proposed main restricted universe multiverse
deb-src http://mirrors.aliyun.com/ubuntu/ bionic-backports main restricted universe multiversectrl+x退出,输入y再点enter确定修改换源完成
更新包
sudo apt update会将新的包下载下来sudo apt upgrade会升级为最新的包,两条命令顺序不要反了- 以后安装软件就可以
sudo apt install 软件名了,嘻嘻,快捷方便
完成
恭喜你,你的wsl已经搞定啦,享受Linux带来的快乐吧!